With the arrival of spring, many of us are motivated to give our homes a deep clean, but it’s also the perfect time to focus on mold removal. This hidden foe lurks in damp corners, silently affecting the air quality and health of your living spaces. Of course, keeping your home free of mold is easier than needing mold clean up, which is why we’ve written this blog for you!
Today, we’ll share essential tips for integrating mold removal techniques into your spring cleaning routine, ensuring your efforts lead to a truly fresh and healthy home environment.
Keep reading to learn more!
Tip 1: Deep cleaning high moisture areas
One essential task of mold clean up is deep cleaning high moisture areas, as these spots easily become a breeding ground for bacteria, mold, and other allergens.
One area that often accumulates moisture is the bathroom. From hot showers to steamy baths, the bathroom becomes a haven for mold and mildew if proper cleaning is not done regularly. Here are some simple steps to deep clean this high-moisture area:
Step 1: Gather your supplies
To effectively clean your bathroom, you will need a few supplies. Make sure you have rubber gloves, a disinfecting cleaner, a scrub brush, a sponge, and a microfiber cloth. These tools will help you tackle even the toughest dirt and grime.
Step 2: Start with the shower or bathtub
Begin your deep cleaning journey by focusing on the shower or bathtub. These areas are prone to soap scum, grime, and mold buildup. Spray a generous amount of disinfecting cleaner onto the surfaces and let it sit for a few minutes to loosen the dirt.
Then, scrub the walls, floor, and any other areas with a scrub brush to remove any residue. Rinse thoroughly with water to ensure all the cleaner is gone.
Step 3: Tackle the toilet
Now, it’s time to give your toilet a thorough cleaning. Apply the disinfecting cleaner to the inside of the bowl and let it sit for a few minutes to break down any stains or odor-causing bacteria.
While you wait, use the microfiber cloth to wipe down the exterior surfaces of the toilet, including the seat, lid, and handle. Once the cleaner has had time to work its magic, scrub the bowl with a toilet brush and flush away any remaining dirt.
Step 4: Clean the sink and countertops
Next, focus on the sink and countertops. Begin by wiping them down with a damp sponge to remove any dust or debris. Apply the disinfecting cleaner and scrub away any stains or bacteria using the sponge. Be sure to pay attention to the area around the faucet, where grime easily accumulates. Finish off by rinsing with water and drying the surfaces with a clean cloth.
Step 5: Don’t forget about the floors
Finally, give the bathroom floors a good cleaning. Start by dry sweeping or vacuuming to remove any loose dirt or hair. Next, mop the floors using a combination of warm water and a mild floor cleaner. Pay special attention to corners and edges where moisture can accumulate. Once finished, make sure to let the floors dry completely to prevent any slip hazards.
Tip 2: Enhancing home ventilation
When it comes to spring cleaning, many people focus on tidying up their homes and making them look spotless. But have you ever thought about the air quality in your home? Ensuring proper ventilation is crucial for a healthier and fresher living environment.
Why is good ventilation important? Well, think about all the things we do indoors that can affect the air quality. From cooking delicious meals to using cleaning products, and even simply breathing, all these activities contribute to the build-up of pollutants inside our homes. Poor ventilation will trap these pollutants, leading to stale air and potential health issues.
So, let’s dive into some tips that will help you improve ventilation in your home and keep the need for mold remediation at bay:
1. Open the windows
One of the easiest and most cost-effective ways to improve air circulation is to open your windows. Even a few minutes of fresh air can make a significant difference. Try to open windows on opposite sides of the house or apartment to create a natural cross breeze, allowing fresh air to enter and stale air to exit.
2. Use exhaust fans
Exhaust fans play a vital role in removing unwanted odors and maintaining good air circulation, particularly in areas where moisture accumulates. You have probably seen exhaust fans in your kitchen and bathroom. When cooking or taking a hot shower, turn on these fans to vent out the steam, odors, and excess humidity.
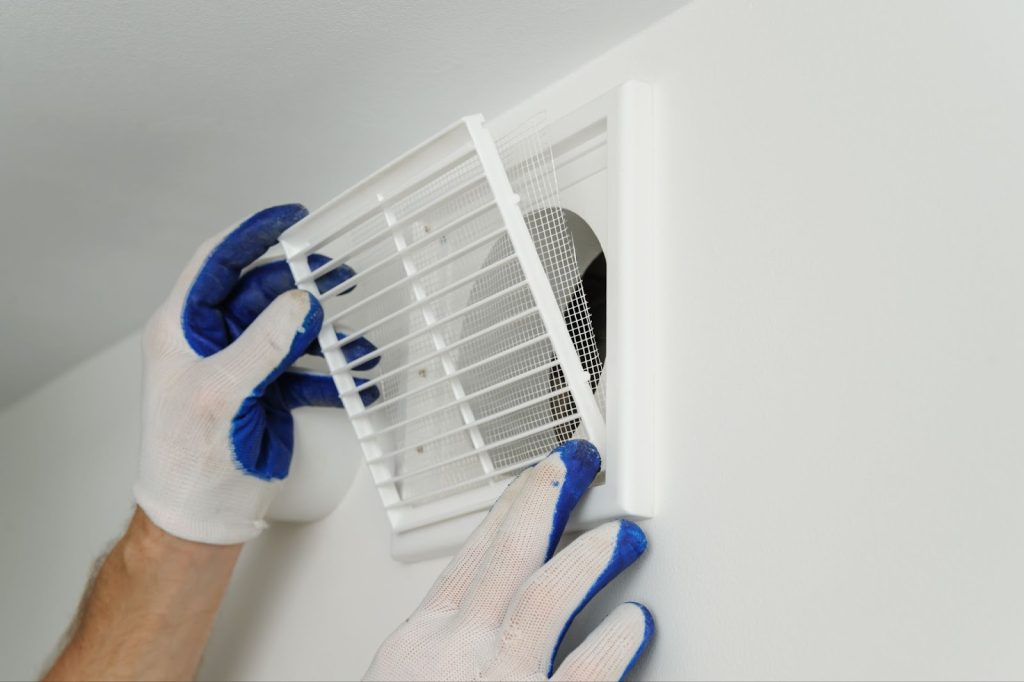
3. Clean air vents and filters
Over time, dust and debris accumulate on air vents, hindering the airflow. Regularly clean these vents using a damp cloth or vacuum cleaner to ensure proper ventilation. Furthermore, pay attention to your HVAC system’s filters. Clogged filters reduce the efficiency of your system and circulate dust, allergens, and pollutants in the air. Clean or replace filters as recommended by the manufacturer.
4. Indoor plants
Plants add beauty to your home and act as natural air purifiers. They absorb carbon dioxide and release oxygen, improving the air quality. Some indoor plants are particularly useful in filtering out common household pollutants. Spider plants, peace lilies, and aloe vera are excellent choices for cleaner indoor air.
5. Consider an air purifier
If you want to take your home’s air quality to the next level, investing in an air purifier can be a great option. These devices help remove airborne pollutants and allergens and reduce the risk of needing mold remediation, making your home’s air cleaner and safer. Look for air purifiers with a HEPA filter, known for their efficiency in capturing microscopic particles.
6. Keep your home clean
Regular cleaning is essential for good air quality. Dust and vacuum your home regularly to reduce dust mites and airborne particles. Use non-toxic cleaners whenever possible to minimize chemical pollutants in the air. Also, don’t forget to wipe down surfaces and remove any mold or mildew that may be present.
8. Keep moisture in check
Excess moisture often leads to mold growth and poor air quality. Ensure proper ventilation in bathrooms and kitchens where moisture is more likely to accumulate. Always use exhaust fans or open windows to remove excess humidity. Fix any leaks promptly to prevent the growth of mold and mildew.
Tip 3: Controlling indoor humidity levels
Indoor humidity refers to the amount of moisture present in the air within your home. While it’s essential to have some humidity, too much or too little creates problems. Excessive humidity leads to the growth of mold and mildew, which triggers allergies and respiratory issues.
On the other hand, low humidity levels will cause dry skin, irritated eyes, and worsen existing respiratory conditions.
There are a few key reasons why controlling indoor humidity is essential:
1. Comfort
Optimal humidity levels will help you feel more comfortable in your home. When the air is too dry, it causes dryness in your throat and nasal passages, leading to discomfort and difficulty breathing. Similarly, excessive humidity will make you feel sticky and sweaty.
2. Health
Maintaining the right humidity levels can improve your overall health. High humidity often creates a breeding ground for allergens, such as dust mites and mold spores, triggering allergies and asthma attacks. On the other hand, dry air makes your respiratory system more vulnerable to infection.
3. Protection
Proper humidity control helps protect your belongings. Too much humidity damages wood furniture, musical instruments, and electronic devices. Conversely, low humidity causes wood to crack, warp, or musical instruments to go out of tune.
Now that we understand the importance of controlling indoor humidity, let’s explore some practical tips to help you maintain optimal levels:
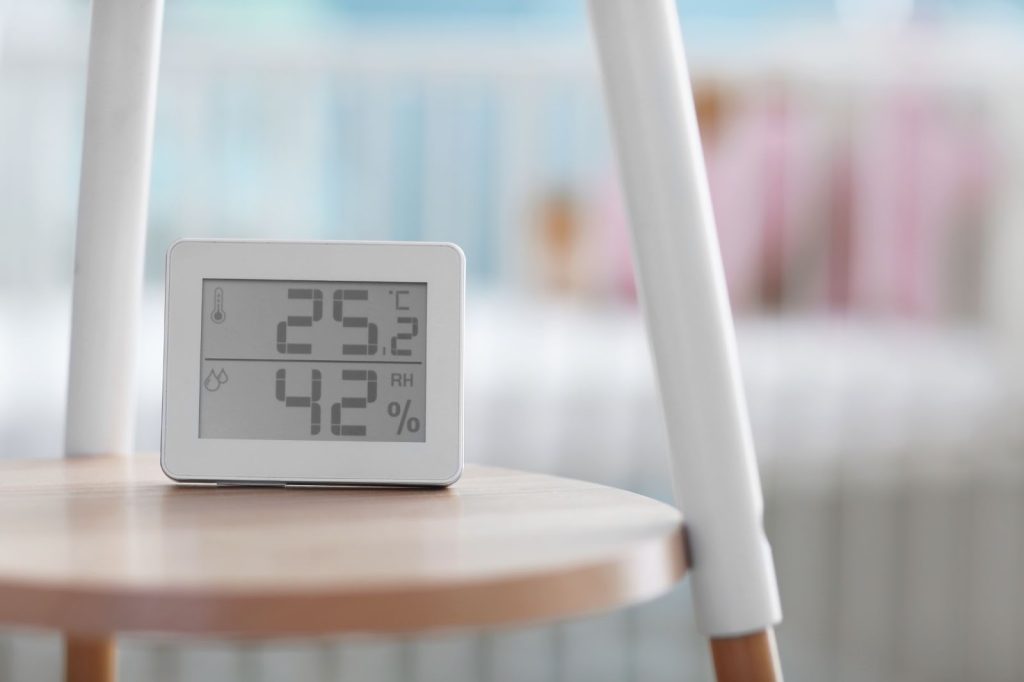
1. Invest in a hygrometer: A hygrometer is a small device that measures the humidity levels in your home. It’s an inexpensive tool that will give you an accurate idea of the humidity levels, allowing you to take necessary actions accordingly.
2. Ventilate properly: Proper ventilation is crucial to maintain optimal humidity in your home. Open windows and doors regularly to let fresh air circulate. Utilize exhaust fans in the kitchen, bathroom, and other high-humidity areas to remove excess moisture.
3. Use a dehumidifier: A dehumidifier is a device that removes excess moisture from the air. It’s particularly useful if you live in a humid climate or have areas prone to moisture accumulation, such as basements or laundry rooms. Set the dehumidifier to maintain optimal humidity levels, typically between 30-50%.
4. Avoid over-watering indoor plants: While plants improve indoor air quality, over-watering them will increase humidity levels. Ensure your plants are not sitting in excess water, and water them only when necessary.
5. Fix leaks and drips promptly: Any leaks or drips should be fixed promptly to prevent moisture build-up. Check for leaking pipes, faucets, or roof leaks, as they contribute to excessive humidity and potential mold growth.
6. Air-dry laundry outside: Whenever possible, hang your laundry outside to dry rather than using a clothes dryer indoors. This will prevent excess moisture from being released into the air, improving humidity levels inside your home.
Tip 4: Using mold-resistant products
To prevent mold growth in your home while you’re spring cleaning, it’s important to use mold-resistant products. These products are specially designed to inhibit mold growth and help keep your home mold-free. Here are some tips on how to use mold-resistant products effectively:
1. Choose mold-resistant paint
When painting your walls, opt for paint that is specifically formulated to resist mold growth. Mold-resistant paint contains additives that help prevent mold from developing on the painted surface. It’s a simple but effective way to protect your walls from mold in areas that are prone to moisture, like bathrooms and basements.
2. Use mold-resistant caulk and sealants
Caulk and sealants are commonly used to fill gaps and cracks in your home. Using mold-resistant caulk and sealants helps prevent mold growth in areas where moisture can easily accumulate, such as around sinks, tubs, and windows. These products contain anti-microbial properties that discourage mold and mildew from forming.
3. Consider mold-resistant fabrics
Fabrics can also harbor mold if they are exposed to excess moisture. When choosing textiles for your home, look for materials that are naturally resistant to mold. Fabrics like nylon, polyester, and wool are good options. Some manufacturers also treat fabrics with antimicrobial finishes, which further inhibit mold growth.
Western Disaster Clean Up
Ready to tackle mold removal and ensure your spring cleaning leaves your home truly fresh and healthy? Don’t let mold dampen your spirits or your spaces.
For comprehensive mold remediation services that promise peace of mind and a healthier living environment, turn to the experts at Western Disaster Clean Up. We’re experts in mold clean up and can help in any area you need.
Contact Western Disaster Clean Up today and breathe easier tomorrow, knowing your home is in expert hands.