The importance of timely water damage restoration
Whether it’s a burst pipe, a leaky roof, or melting snow seeping into your home, dealing with water damage is challenging. However, the key to minimizing the damage and expenses lies in the timely restoration of affected areas.
When faced with water damage, acting quickly makes all the difference. Ignoring the issue or delaying restoration efforts will exacerbate the damage and may lead to additional problems. Mold growth, structural deterioration, and health risks are only a few of the consequences that could arise from neglecting water damage cleanup.
Simply put, addressing water damage as soon as you notice it is imperative. Now, let’s dive into tips for exactly how to do that as winter turns into spring.
Tip 1: Assess the extent of the damage
You’ll want to start with a water damage assessment. Assessing the damage means figuring out how much harm has been done to your home. Your assessment should include inspecting all areas, both inside and outside, that are prone to water damage.
Look for signs like damp walls, water stains, or visible mold and mildew. Also, check if the floors are wet or if there are any leaks in the ceiling.
One important thing to remember is to stay safe during the water damage assessment. Ensure the power supply is turned off in the affected areas to avoid electrical hazards. It’s also a good idea to wear protective gloves and a mask when dealing with damp or moldy areas, to keep yourself healthy.
To help with the water damage assessment, it’s a good idea to create a checklist. On the checklist, note down all the areas that are affected by water damage. Take pictures or videos as evidence, as this can be useful when discussing the situation with professionals, such as plumbers or insurance agents.
Once you have a clear idea of the extent of the damage, you can plan your next steps. If the damage is minimal, you might be able to handle the repairs yourself. You can perform simple tasks like fixing leaks or cleaning up small areas of mold with basic tools and cleaning supplies. However, it’s best to seek professional help for more extensive damage.
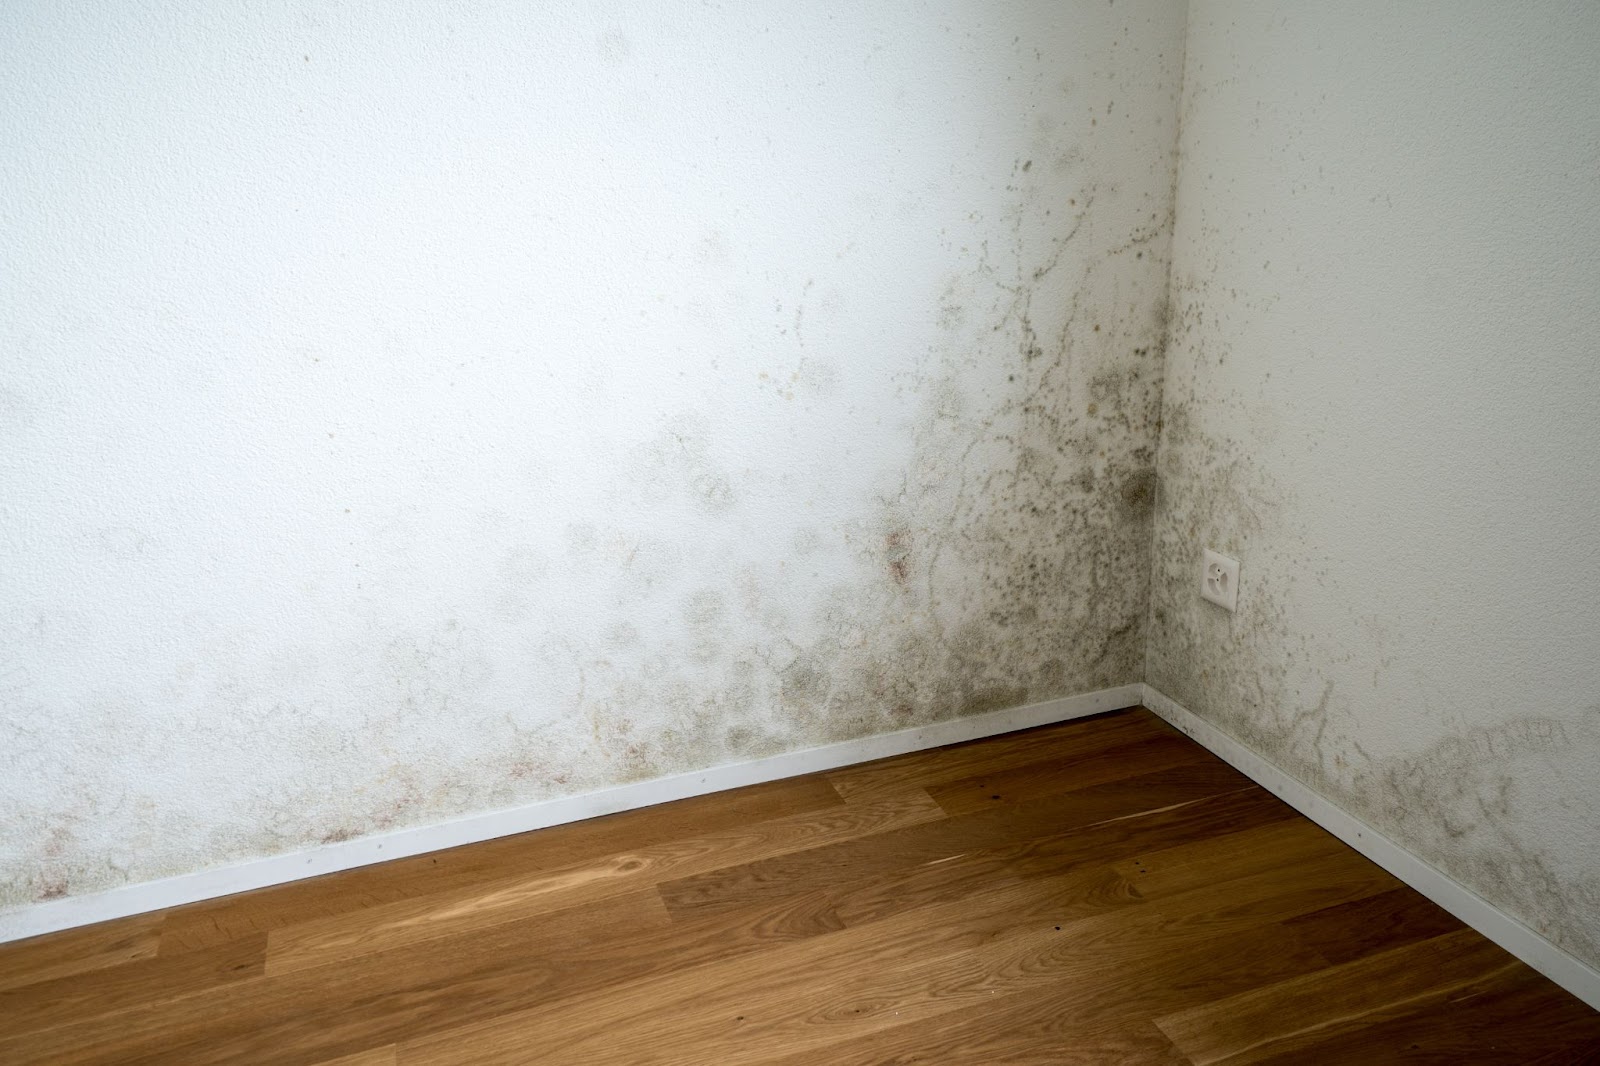
Tip 2: Prevent mold and mildew growth
Drying out the affected areas is the first and most important step in preventing mold and mildew growth. Using towels, mops, or even a wet/dry vacuum, remove any standing water.
Once the majority of the water is gone, fans or open windows are used to facilitate air circulation in the space. This helps speed up the drying process and discourages mold and mildew from finding a damp environment to thrive.
Reduce humidity levels
Humidity is a breeding ground for mold and mildew. To prevent their growth, it’s vital to reduce the humidity levels in your home. Using a dehumidifier to extract moisture from the air is a good idea, particularly in areas prone to dampness, such as basements and bathrooms. Additionally, ensure proper ventilation by running exhaust fans or opening windows when cooking, showering, or doing laundry.
Clean and disinfect thoroughly
When water damage strikes, it’s crucial to clean and disinfect the affected areas thoroughly. Mold and mildew grow on various surfaces, including walls, furniture, and carpets.
Use a mixture of warm water and mild detergent to clean hard surfaces, wiping away any visible mold or mildew. Consider using a vacuum cleaner with a HEPA filter for carpets and soft furnishings to remove spores effectively.
Fix and repair leaks
Leaky pipes or roofs can be a significant source of excess moisture that encourages mold and mildew growth. Regularly inspect your home for any signs of leaks and address them promptly. Repairing leaks prevents further water damage and helps keep humidity levels in check.
Monitor and maintain
Once you have taken steps to prevent mold and mildew growth, it’s crucial to monitor and maintain your efforts. Keep an eye out for any recurring signs of mold or mildew, such as musty odors, discoloration, or respiratory issues. Regularly inspect areas prone to dampness, ensuring they stay clean, dry, and well-ventilated.
Tip 3: Dealing with frozen pipes
The first step in dealing with frozen pipes is to turn off the main water supply. This is crucial to prevent any further damage caused by water leakage. Locate the main shut-off valve in your home, which is typically found near the water meter. Make sure every member of your family knows how to shut off the water supply in case of emergencies.
Thaw the pipes safely
After turning off the water supply, it’s time to thaw the frozen pipes. However, it’s important to proceed cautiously to avoid causing additional harm. Start by opening the faucet connected to the frozen pipe; this will relieve pressure and allow water to flow freely once the pipe is thawed.
Use a hairdryer or a heating pad to safely thaw a frozen pipe. Ensure you do not use open flames or high heat sources; they can damage the pipe and start a fire. Gently apply heat to the pipe, starting from the end nearest the faucet and working towards the frozen section. Remember to keep the faucet open to allow water to escape as it thaws.
Inspect for leaks and damage
After successful thawing, examine the pipes thoroughly for any leaks or damage. Look for signs of water around the pipes, damp spots, or discoloration on walls and ceilings. If you notice any leakage, secure the area by applying plumber’s tape or towels to temporarily keep the water from spreading further.
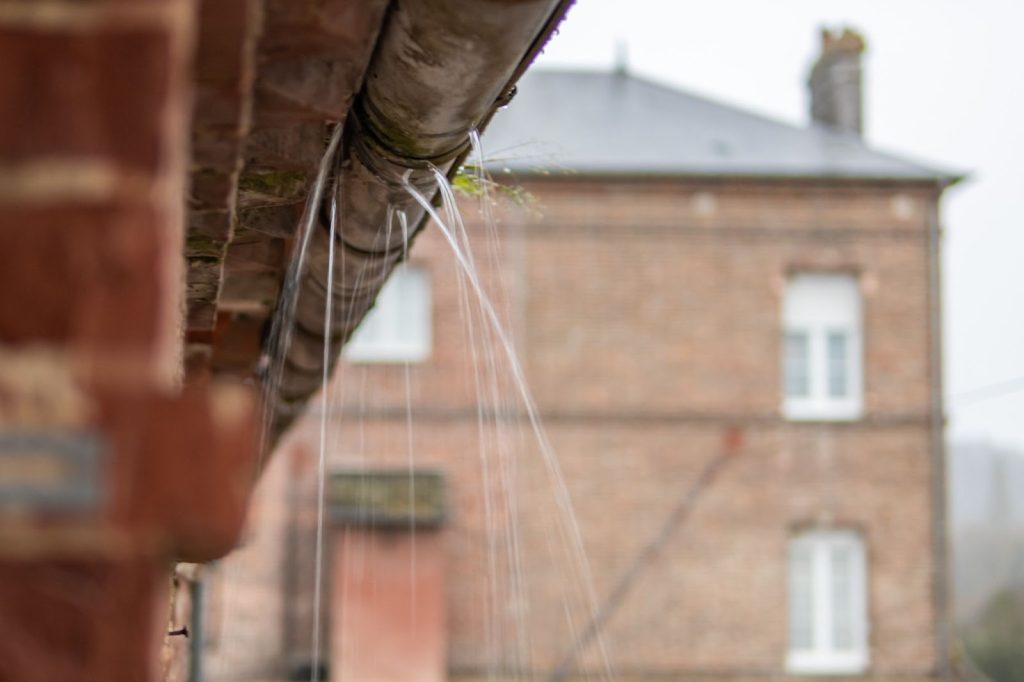
Tip 4: Repairing roof and ceiling damage
Start by inspecting your roof and ceilings for any signs of water damage. Look for discoloration, damp spots, sagging or bulging areas, or peeling paint. These are all telltale signs that water might have seeped through and caused damage.
Fix roof leaks
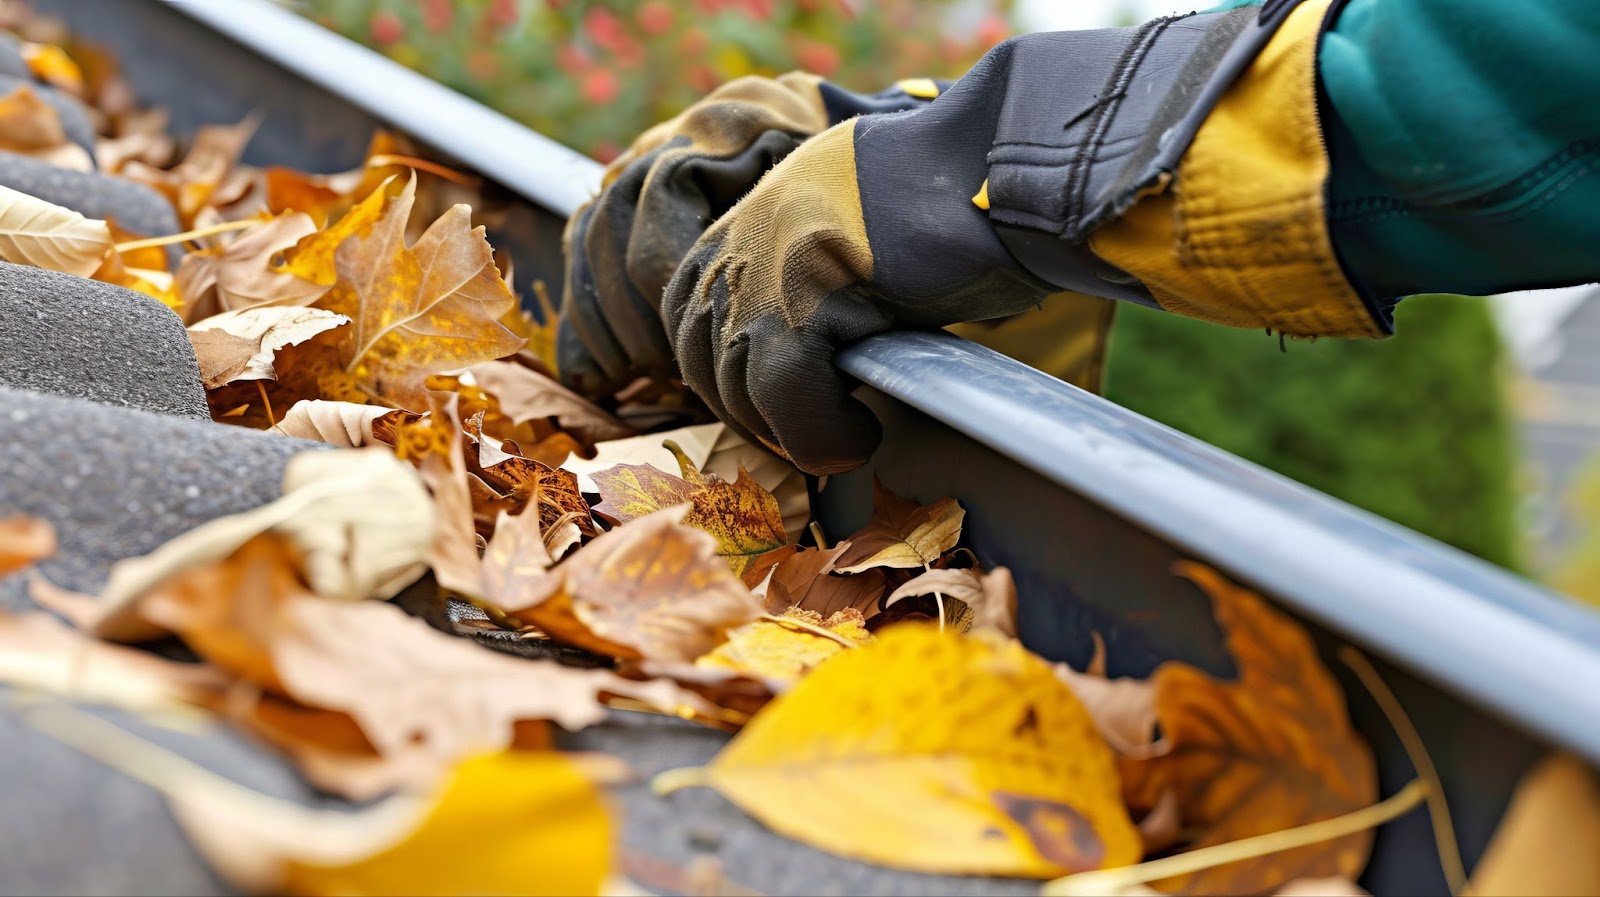
If you notice any leaks in your roof, immediately fix them. Start by clearing any debris like leaves or branches from your gutters and downspouts. Clogged gutters often lead to water overflowing and seeping into your home.
Consider using a roof patching compound or sealant to cover small leaks temporarily. However, for more extensive or serious leaks, it’s best to call in a professional roofer who can provide the necessary expertise.
Dry and clean your ceiling
Once you’ve addressed your roof leaks, it’s essential to dry and clean your ceiling. Start by placing buckets or containers beneath any active leaks to catch the drips and prevent further water damage. Next, use a sponge or cloth to absorb any excess water on the affected areas of your ceiling. This will help prevent further saturation and minimize the risk of mold growth.
Repair the ceiling
After your ceiling is dry, you can begin repairing any damage. For minor cracks or holes, use a spackling compound or putty knife to fill them in. Allow the compound to dry thoroughly before sanding and smoothing the area with sandpaper.
It’s advisable to seek professional help for larger or more severe damage. They will have the skills and tools necessary to ensure proper repairs.
Prevent future water damage
Lastly, it’s important to take steps to prevent future water damage to your roof and ceilings. Regularly inspect and maintain your roof by removing debris and repairing any loose or damaged shingles. Ensure your gutters are clear and properly functioning, directing water away from your home’s foundation.
Additionally, consider installing roof edge flashing to direct water away from vulnerable areas. Lastly, keep an eye out for indoor condensation, as excessive moisture can cause damage to your ceiling over time.
Tip 5: Restoring flooded basements
Dealing with a flooded basement is overwhelming, but with the right steps, you’ll restore it back to its original condition. Here are some helpful tips to get you started:
Safety first
Turn off all electricity before entering your flooded basement to avoid potential hazards. If you need help with this, ask an adult or seek professional help. Always prioritize safety when dealing with water damage.
Remove the water
Start the restoration process by removing the water from your basement. If the area isn’t too large, you can use a wet-dry shop vacuum or even a mop and buckets. Be diligent and thorough in your efforts to get rid of all the water.
Dry the area
Once the water is gone, it’s crucial to dry out the basement completely. Open windows and use fans or dehumidifiers to improve air circulation. If the weather permits, use natural sunlight to help dry the space. Remember, the more dry the area, the less chance for mold growth.
Salvage what you can
While some items may be beyond repair, there might still be things you can save. Remove wet or damaged items and separate them into categories: salvageable and unsalvageable. Clean and dry salvageable items, but promptly discard what’s unsalvageable.
Clean and disinfect
Your basement might still harbor bacteria and germs even after removing the water. Thoroughly clean all surfaces using a mild detergent and warm water. Afterward, disinfect the area using a bleach solution (mix 1 cup of bleach with 1 gallon of water). Make sure to wear protective gloves and open windows for ventilation while cleaning.
Prevent future water damage
It’s essential to identify and address the cause to avoid future flooding. Check for any cracks or gaps in the walls or foundation, and seal them appropriately. Consider installing a sump pump or a water alarm system to provide early detection of water infiltration. Consult a professional if needed.
Seek professional help if necessary
If the water damage is extensive, or if you’re uncomfortable handling the restoration process alone, don’t hesitate to call a professional water damage restoration company. They have the knowledge, experience, and tools to handle the situation effectively.
Restoring a flooded basement takes time and effort, so be patient throughout the process. By following these tips, you can successfully bring your basement back to life and create a safer environment for you and your family.
Western Disaster Clean Up is here to help
If you’re facing the aftermath of winter’s harsh effects on your home, remember, you’re not alone in this challenge. Water damage is overwhelming, but timely, professional intervention makes all the difference in protecting your property and ensuring your peace of mind.
At Western Disaster Clean Up, we specialize in turning post-winter woes into restoration successes. Our team of experts has the knowledge, tools, and experience needed to tackle any water damage situation, ensuring a swift, effective, and compassionate response to your needs.
Don’t let water damage dampen the spirit of your home. Contact Western Disaster Clean Up today for a comprehensive assessment and the highest standard of restoration services. Let us help you reclaim your comfort, safety, and peace of mind.
Contact Western Disaster Clean Up now, and take the first step towards a fully restored home.